
I’m not sure why it took me so long, but I finally decided to start making my own baby food purees when my 3rd child was 6 months old.
Now, as a working mom, I needed simple recipes and ideas and “no cook” if possible.
After scouring the internet I tried some basic baby food recipes and I’m adding more every week.
Before you get started though, here are a few of my Tips and Suggestions before you begin making your own baby food and purees
TIP & SUGGESTIONS
1) Blender - Use or purchase a good a Blender. I have a Ninja and Nutribullet. I prefer the Ninja to make my own baby food purees while I use the Nutribullet for our (adult) kale blends during the week. But whatever you have will likely work.
2) Freezing – If you want to freeze your freshly made baby food purees, you can use an ice cube try or purchase specific storage containers used for baby food purees. I use both the Samuelworld Baby Food Storage container and the Youngever 18 Individual Pack Baby Food Storage containers. The Samuelworld containers, which holds 12 servings of baby food, is easy to store and takes up less space in the freezer. When you’re ready to use a serving, just remove one frozen baby purees out and thaw it before serving it to your baby.
The individual containers are great for when you just want to store your baby food puree in the refrigerator for up to 3 days or bring it with you on the go. I’ve taking a serving of frozen baby food and put in an individual container and place it in fridge the night before and serve the next day.
Play around with it, you’ll find out what works best for you.
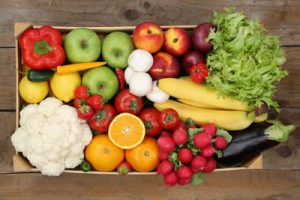
3) Foods - When deciding on your fruits and vegetables, remember that you can use either fresh, bagged, frozen or canned items, depending on what the food is that you’re making.
4) Pre-packaged Foods - If using bagged, frozen or canned foods, make sure that the only ingredients included are the food itself and water (absorbic acid is okay as well).
5) Canned Foods - For canned vegetables, for your diy baby food recipes, make sure that the label states “No Salt Added” AND “Non-BPA Liner”
6) Liquid – Regardless of what baby food purees that you are making, you will need to add water to it in the blender. Water, Breastmilk and Formula are all fine! I’m still nursing my son and pump a few times a week, so I use both water and breastmilk in my diy baby food recipes, it just depends on how protective I am of my breastmilk that day!
7) Cooking – For those foods that need to be cooked, my preferred cooking method is in a crockpot. It’s hard to burn any item in a slow cooker, unless you just leave it for days. Just put the food in the crockpot for a few hours and the fruit or vegetable will be soft and ready to put in the blender. As a plus, the aroma that fills the house from the food in the crockpot is amazing!
8) Consistency – I love that fact that you have complete control over the consistency of your own baby food purees. If you want it a little thicker, don’t put that much water in the blender. If you want it thinner, add more water. Start with a little water first and add more until you get to your desired consistency.
9) Sweetening – If you want to sweeten some of your baby food purees, especially vegetables, I recommend adding a sweeter baby food item to it, such as bananas or sweet potatoes. Never add or give honey to your baby or baby food until they over 1 years old.
10) Be creative and mix your baby food purees for different tastes for your little one!
Ok, so now that we’ve got that over with, you are ready to make you own baby food recipes! And don’t forget to check back often as I will be updating this list as I create new baby food purees.
"NO COOK"
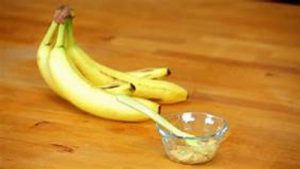
Bananas are the easiest baby food purees to make!
* Tip: Make sure you use bananas that are ripe, but not too ripe for your diy baby food puree. Blend them before brown spots appear on the skin for the best nutrients.
Directions
Step 1: Simply peel and discard the banana peel
Step 2: Cut the banana(s) up in the blender
Step 3: Add your preferred liquid (water, breast milk or prepared formula)
*Remember, just add a little liquid to see the consistency
Step 4: Blend for a few seconds. If it’s too thick then add some more liquid until you reach your desired consistency. If it’s too thin then add more banana(s) or cereal to thicken it up
Step 5: Once blended just place in your storage container(s) of choice and freeze (for up to 3 months) or put them in the fridge for up to 3 days
*Note: Once exposed to air, bananas will turn brownish. They’re okay, just be sure to immediately store properly
"NO COOK"
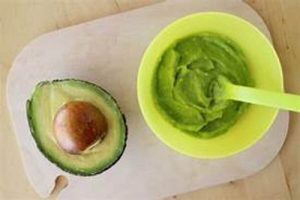
Next to Bananas, Avocados are super easy to make, because there’s no making involved!
* Tip: Picking the right avocado is key. Make sure the avocado is firm with a little give when you squeeze it. It should not be hard or soft.
Directions:
Step 1: Cut the avocado in half and remove the seed
Step 2: Scoop the flesh out of each half and into the blender
Step 3: Add your preferred liquid (water, breast milk or prepared formula)
*Remember, just add a little liquid to see the consistency
Step 4: Blend for a few seconds. If it’s too thick then add some more liquid until you reach your desired consistency. If it’s too thin then add more avocado or cereal to thicken it up
Step 5: Once blended just place in your storage container(s) of choice and freeze (for up to 3 months) or put them in the fridge for up to 3 days
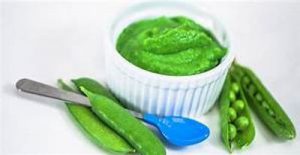
Now while you can buy fresh peas in the pods that need to be cooked, that is not my preferred method of making your own baby peas. I suggest buying frozen peas or peas in a can.
If you get the peas in a can, look for 2 things on the label:
1) No Salt Added;
2) Non-BPA Liner
The following recipe is for peas in a can, per the above restrictions.
Directions:
Step 1: Open the can of peas, drain them in another bowl or container and rinse with water
Step 2: After rinsing the peas, pour them into the blender
Step 3: Add your preferred liquid (water, breast milk or prepared formula)
*Remember, just add a little liquid to see the consistency
Step 4: Blend for a few seconds. If it’s too thick then add some more liquid until you reach your desired consistency. If it’s too thin then add more peas or cereal to thicken it up
Step 5: Once blended just place in your storage container(s) of choice and freeze (for up to 3 months) or put them in the fridge for up to 3 days
"COOKING REQUIRED"
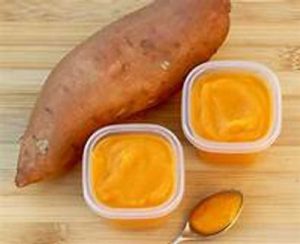
My preferred method in cooking sweet potatoes is in the oven.
After a little time in the oven, these sweet potatoes make the whole house smell fall fresh!
Directions:
Step 1: Wash and poke a few holes in each sweet potato prior to placing in the oven
Step 2: Cook sweet potatoes oven at 350 degrees between 1-2 hours and take out when completely soft
Step 3: Once the sweet potatoes have cooled down (I let mine cool for at least a few hours), peel them and scoop the flesh and put it in your blender
Step 4: Add your preferred liquid (water, breast milk or prepared formula)
*Remember, just add a little liquid to see the consistency
Step 5: Blend for a few seconds. If it’s too thick then add some more liquid until you reach your desired consistency. If it’s too thin then add more sweet potatoes or cereal to thicken it up
Step 6: Once blended just place in your storage container(s) of choice and freeze (for up to 3 months) or put them in the fridge for up to 3 days
"COOKING REQUIRED"
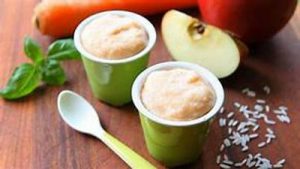
I love, love, love making my own apple baby food! Why? Because I can use 1 batch of cooked apples for 3 different recipes:
1) Apple Food Puree – for the 6 month old
2) Apple Chunks - add cinnamon and sugar to the cooked chunks for my 2 year old; and
3) Baked Apple Peels - again add cinnamon and sugar and bake them in the oven at 300 degrees for about 30 minutes as a healthy treat for the adults in the house
For The baby apple food puree I suggest cooking them in a crockpot, but you can also cook them on the stove in a little water on in the oven.
The following directions are for cooking them in a slow cooker.
Directions:
Step 1: Rinse and core between 4-6 large apples, preferably with a corer. I purchased my corer from Amazon, and it’s one of my favorite kitchen utensils because it makes coring apples a cinch
Step 2: Peel the apples and set the peels to the side if you want to bake them later for apple peels, otherwise you can just eat or discard them
Step 3: Cut the apples into 8 slices and then cut each slice into 3 or 4 chunks and then place them all into the crockpot
Step 4: Once all of the apples are in the crockpot, pour about 1 cup of water into the pot
Step 5: Turn the crockpot on high and cook for 1 ½ - 2 hours, and then let them cool down
Step 6: Once the apples have cooled, spoon them out, with the water still in the spoon and pour them into the blender
Step 7: Blend for a few seconds. If it’s too thick then add some more liquid until you reach your desired consistency. If it’s too thin then add more apples or cereal to thicken it up
Step 8: Once blended just place in your storage container(s) of choice and freeze (for up to 3 months) or put them in the fridge for up to 3 days
_________________________________________________________________________________
If you want to make Apple Chunks for you or an older child like I do, then only use 50-75% of the cooked apples for the baby puree
Sprinkle cinnamon and sugar over the remaining cooked apple chunks in the crockpot and stir; Serve immediately or chill and serve later
"NO COOK"
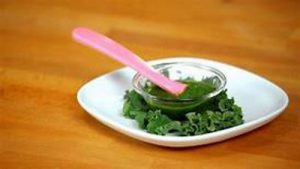
We make Kale blends and drink them throughout the week, so kale is a staple food in our house anyway.
To make your own kale baby food puree, buy it either by the bunch or bag. If you buy it in a bunch, remember to wash it thoroughly and remove the leaves from the stem. If you buy kale in a bag, its already chopped up so all you need to do is rinse it.
Directions:
Step 1: Put a handful of kale into the blender
Step 2: Add your preferred liquid (water, breast milk or prepared formula)
*Remember, just add a little liquid to see the consistency
Step 3: Blend for a few seconds. If it’s too thick then add some more liquid until you reach your desired consistency. If it’s too thin then add more kale or cereal to thicken it up
Step 4: Once blended just place in your storage container(s) of choice and freeze (for up to 3 months) or put them in the fridge for up to 3 days
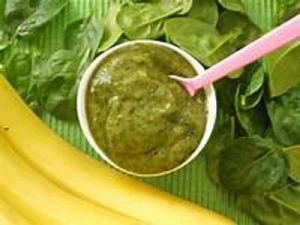
*Note: I mix my kale with sweet potatoes or banana purees before placing it in a storage container because it both sweetens it and thickens it. But you can freeze the kale by itself and add other baby food purees or cereal later to sweeten and/or thicken it
"NO COOK"
The make you own baby food with spinach is very similar to kale, but less messy.
I use Baby Spinach, no pun intended, to make a baby spinach baby food puree and you can buy it either by the bunch or in a bag. If you buy it in a bunch, remember to wash it thoroughly. It’s up to you to cut the stems off or keep them on. If you buy baby spinach in a bag, its already de-stemmed so all you need to do is rinse it.
Directions:
Step 1: Put a handful of baby spinach into the blender
Step 2: Add your preferred liquid (water, breast milk or prepared formula)
*Remember, just add a little liquid to see the consistency
Step 3: Blend for a few seconds. If it’s too thick then add some more liquid until you reach your desired consistency. If it’s too thin then add more kale or cereal to thicken it up
Step 4: Once blended just place in your storage container(s) of choice and freeze (for up to 3 months) or put them in the fridge for up to 3 days
*Note: I mix my kale with sweet potatoes or banana purees before placing it in a storage container because it both sweetens it and thickens it. But you can freeze the kale by itself and add other baby food purees or cereal later to sweeten and/or thicken it

"MINIMAL COOKING REQUIRED"
I have 2 easy and simple ways to prepare your carrots for baby food purees, but the difference is the time it takes to prepare them.
If you like the sweet smell of carrots in the house, then the crockpot is the way to go. Just wash the carrots before you put them in and add between 1/2 – 1 cup of water to cover the bottom of the pot.
Turn the crockpot on high for 2-3 hours and then follow the below directions once they have cooled.
However, if you want a really quick way to prepare your diy baby food, then simply get a bag of frozen carrots that can be steamed in the bag in the microwave. The outside of the bag will state that so no need to guess.
You usually just place the bag in the microwave and heat for 5-7 minutes. That’s it! Just let them cool, and continue blending as normal. Enjoy!
Directions:
Step 1: Once the carrots have cooled down, regardless how you cooked them, place them in your blender
Step 2: Add your preferred liquid (water, breast milk or prepared formula)
*Remember, just add a little liquid to see the consistency
Step 3: Blend for a few seconds. If it’s too thick then add some more liquid until you reach your desired consistency. If it’s too thin then add more sweet potatoes or cereal to thicken it up
Step 4: Once blended just place in your storage container(s) of choice and freeze (for up to 3 months) or put them in the fridge for up to 3 days